
Adding a new company/Processing more than one payroll
You can use Payroll Pro to process payrolls for more than one company on the same computer.
To do this, select FILE then CREATE NEW COMPANY, then fill out the on screen information.
Payroll Pro will allow you to process 3 payruns before paying for and entering a company registration code, which will unlock the 3 pay run limit. However, we do suggest purchasing your company registration code as soon as possible before your 3 payruns have been processed to avoid delays.
Detailed Instructions
- From the main menu in Payroll Pro, select FILE, then from the drop down menu, select CREATE NEW COMPANY
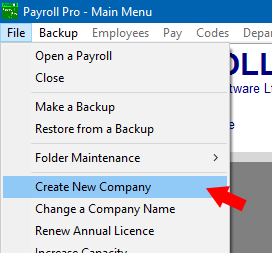
- The following will now appear.
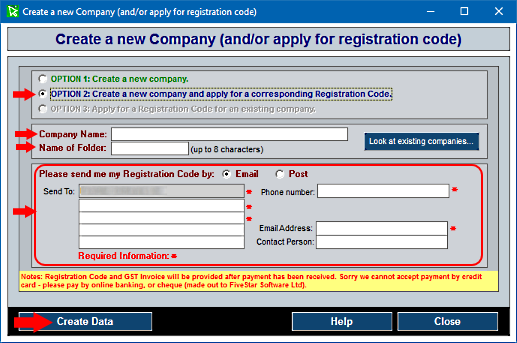
2a. Select "OPTION 2: Create a new company and apply for a corresponding Registration Code".
2b. Enter the new company name.
2c. Then enter the name of the folder for this to go into. The folder will default to the first 8 characters of the name so that is fine to use.
2d. Enter address details etc.
2e. Then click "Create Data".
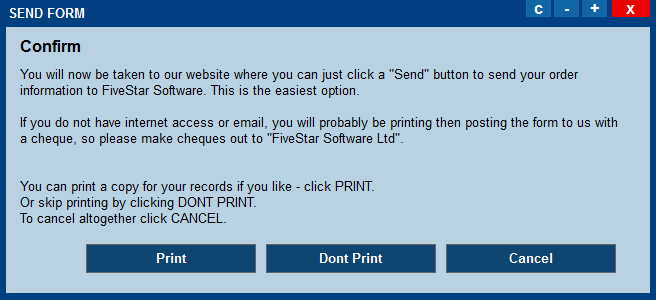
- You will now see similar to the following.
Click "Print" for a copy of the information for yourself – otherwise click "Don't Print" if you don't want a copy for yourself
(but we do recommend printing a copy).
- You will then be taken to our website where you can just click "Send":
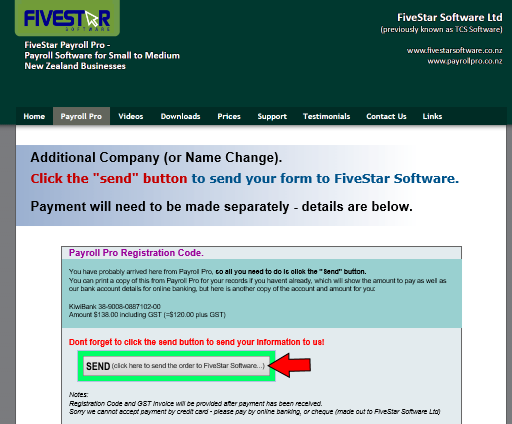
The cost for the registration code will be shown on the screen and forms (latest prices can be found here).
Payroll Pro will allow you to process 3 payruns before paying for and entering a company registration code, which will unlock the 3 pay run limit. However, we do suggest purchasing your company registration code as soon as possible before your 3 payruns have been processed to avoid delays.
New Company Not Showing
If you created a new company and it is not showing in the list, try the following:
- Exit Payroll Pro, then restart Payroll Pro.
- When the Payroll Data Selection window appears, click the "Change" button.

- You will be asked if you want to change the "Main Payroll Data Folder". Answer "Yes".
- The "Change..." button will become "Hide Browse List". Click this new button "Hide Browse List" now.
The Select Payroll Data Folder will return to its initial size, and the button will revert back again to say "Change...". - Click "Cancel" then exit Payroll Pro. Follow instructions from the top of this page again. This should have now solved the problem.