
Screen shots - Payday Filing
Step 4:
Amending a previously filed (uploaded) payday file
If you have made any changes to a pay AFTER filing (uploading) - for example, undo update totals, make a change, re-update totals - you can create another file for that same payment date. This will also work if you have added extra employees to the pay, or removed any employees from the pay.
Everything is the same as per previous instructions, except now you will receive another message in Payroll Pro:
> Click the button: Click here to Create your payday File...: AS LONG AS YOU ARE STILL USING THE SAME FILE LOCATION, Payroll Pro will recognise that you have already created a file for this date.
You will see the following if a payday file for the same date was created previously:

Yes - uploaded: select this if you HAVE already uploaded the file for this payment date.
No - not uploaded: Select this if you created the file previously but did not file it (i.e. you did not upload it).
Don't Know: Click this to do nothing - original file will be left intact, and no new file created.
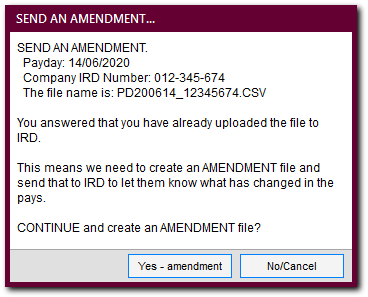
If you click Yes - uploaded, then you will be given the option to create an amendment file.
This is necessary because it lets IRD know what has changed since you uploaded the original payday file. It will also rename the file by adding "amended" to the name. Click Yes- amendment to continue, or click No/Cancel if you are not sure or if you clicked the previousl option by mistake.
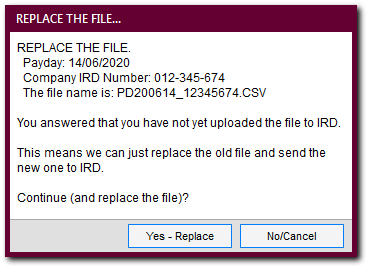
If you click No - not uploaded, then you will be given the option to just replace the original file.
You can replace the original file since it was never sent to IRD. Click Yes-Replace to continue, or click No/Cancel if you are not sure or if you clicked the previous option by mistake.
As before, this will save the file in the location you selected. It will also copy the file location and name to your Windows clipboard, just as if you had used the "cut" command (of "cut and paste"). This means later you can use the paste command (CTRL+V) to paste it into another box.
> You will be given the option to print the report - this contains the information contained in the file and the location of the file.
> Then Payroll Pro will take you to the IRD login page if you have selected the option to do so.
Step-0 Step-1 Step-2 Step-3 Step-4 Step-5 Step-6 Step-7 Step-8