The difference between Version 1 and Version 2
Example - a simple pay week - employee who usually works 8 hours per day, 5 days per week, hourly rate (you are here)
Example - A pay split between more than one department, and saved as the "usual pay"
Further Examples - including showing and hiding days
Video: see video #7 How to process a payrun
EXAMPLE 1 - a simple pay week - employee who usually works 8 hours per day, 5 days per week, hourly rate.
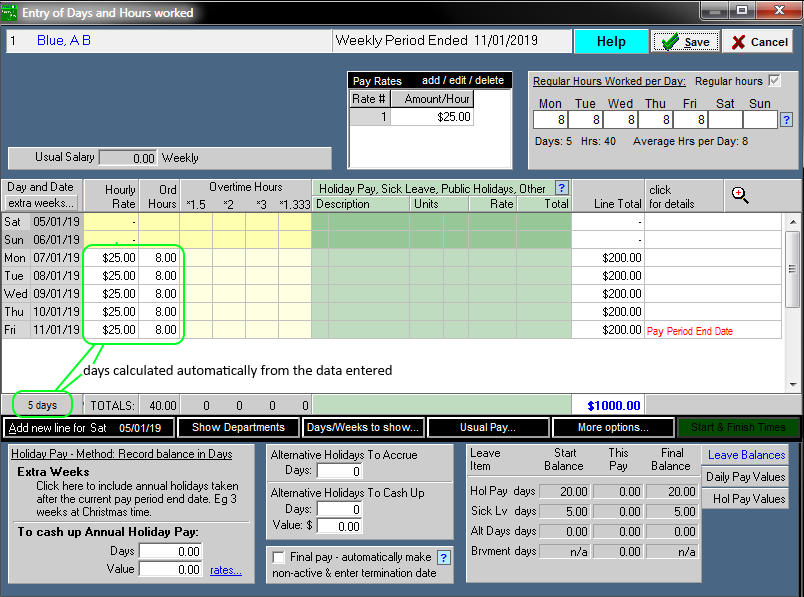
The first image shows how a simple pay week looks in Payroll Pro version 2 - an employee who usually works 8 hours per day, 5 days per week.
The number of hours worked on each day is shown. This means that you can also enter and leave taken (sick leave, holiday pay, etc) beside the date it is taken for a more informative pay history record.
The hours will automatically fill in for you each pay (using the regular hours defined to the upper right) so you don't have to enter them each time. You can however easily change the hours on one or more individual days. This also allows you to have the hours per day listed on the payslip. The hours you would change are those circled in green in the image below.
The regular days (top right) will not be changed unless the employment contract changes. If you change the hours on one or more days for a one off pay, the regular hours will be used to re-populate the "Ord Hours" for the next pay - so you don't have to remember to change these back yourself.

Note that the days (5 days above) is only really relevant for employees who work irregular hours and days where an average daily rate needs to be paid for sick leave etc. For an employee as regular as above, a sick leave day etc would just be 8 hours at the usual rate, so the average daily rate would actually be ignored here.
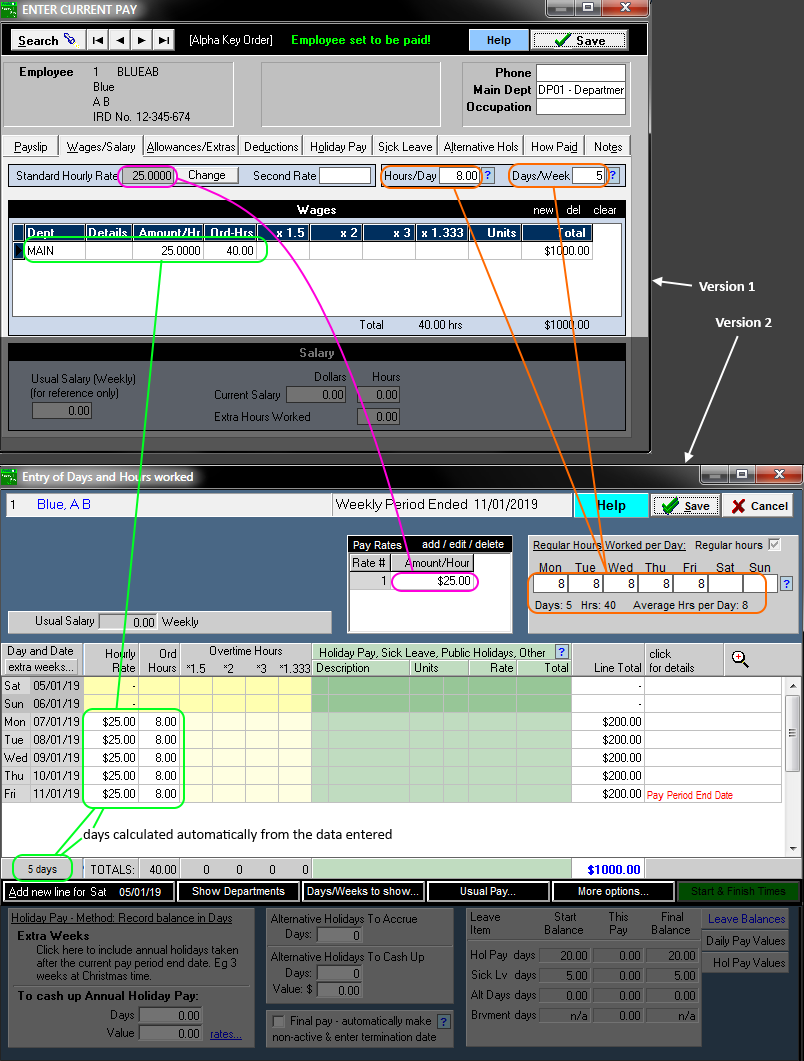
The next image shows the difference between version 1 (top) and version 2 (bottom):

Example - Entering leave - sick leave:
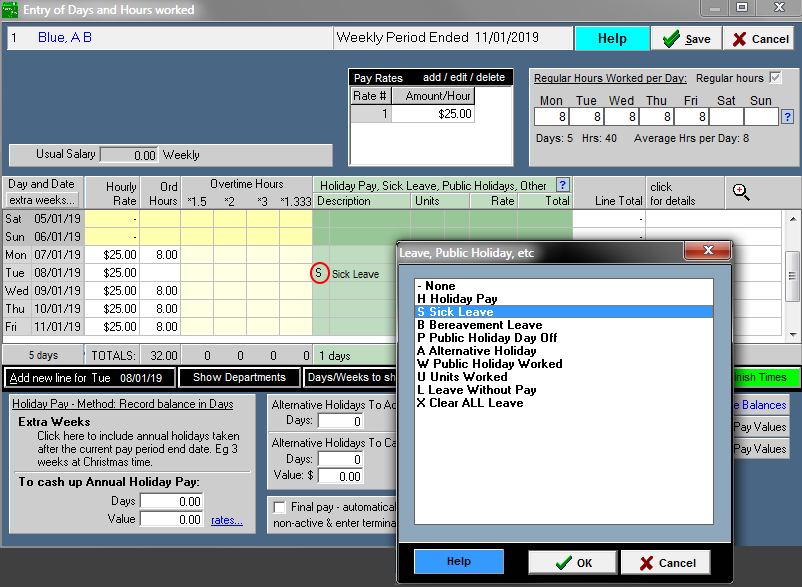
In the green area, you can now double click in the description for the day the leave is taken. Either the first column (where the "S" shows below) or the second column (where "Sick Leave" shows below). The list of leave types will appear for you to select from.
Alternatively, you can type the letter into the description box once you get to know the types.

