
Screen shots - IRD Filing (IR348 and IR345)
Step 10:
Choose the File and Upload it.
Note that this area relates to the IRD's website - please contact IRD if you have any problems with this part.
You will see a "Choose File" button - click this. Note that this might sometimes show as "Browse...".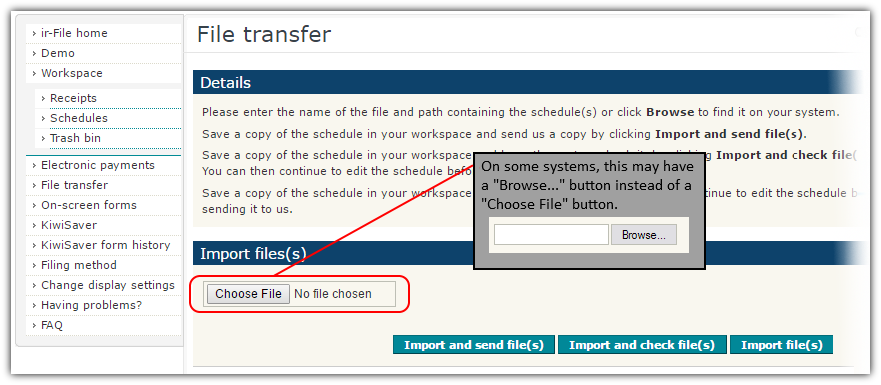
The Windows "Open" box should now appear as shown in the image below.
In the "File Name" box, you may be able to press CTRL + V (paste) from your keyboard to paste the location and name of the file into the "File Name" box. This can be done if you have just recently created the IR348 file in Payroll Pro, since Payroll Pro will copy the location to your computer clipboard.
Check that this is correct - eg a file name something like MSyymmdd.CSV. For example MS120531.CSV for May 2012.
Otherwise you could type in the full location and file name (which is on the printed IR348 report from Payroll Pro).
Finally, you could locate the file from the "look-in" box. This box - look-in - could possibly be called something different (but similar) on different systems. It may not even be called anything in Windows 10 - but it is usually to the left and will show items such as This PC, Desktop, Windows (C:), or other similar items. Again, you will know the location from the Monthly Schedule report printed from Payroll Pro - eg usually a file in the format MSyymmdd.CSV.
Then click "Open".
You can click anywhere on the image below to see the next step. 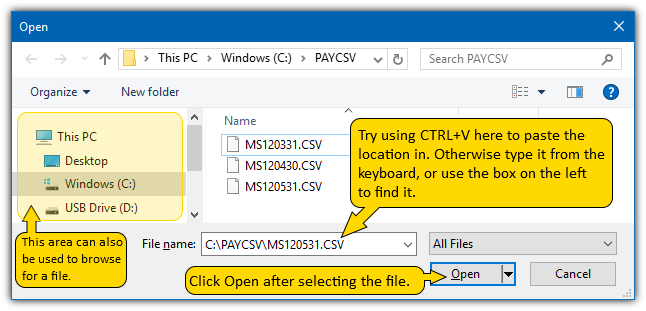
Step-1 Step-2 Step-3 Step-4 Step-5 Step-6 Step-7 Step-8 Step-9 Step-10 Step-11 Step-12 Step-13